This blog is Moving

This blog has changed back to blogspot Papillon Digital Design and the new link is https://papillondigitaldesign.blogspot.com/

Welcome

Welcome to PapillonDigitalDesign. Hope you get inspired by the projects, videos and files. Would love it if you could leave comments and become a follower. (Word verification is turned ON to avoid spam. Sorry for that inconvenience.) Would love it if you would also share your project here . Due to the fact that the blog has moved there maybe some broken links. Please try deleting the s after designs from the broken link and try the link as the new link is http://www.papillondigitaldesign.com/ Thank you for visiting.

Thursday, June 30, 2011

Round We Go, CircDSwirl and CirclePaperLace

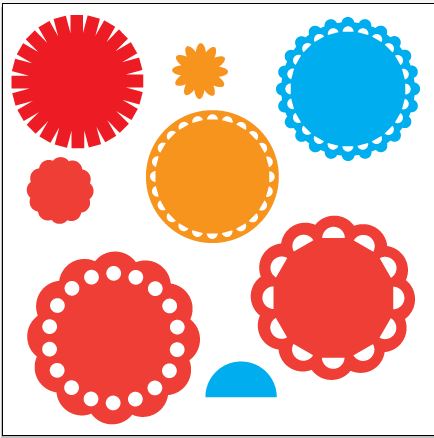
My minds has been on Circles. Well more like I have been playing with circles.  I love swirls, borders and paperlaces more than objects. So I was playing with circles and here are some screenshots of the result. The SVG files are under the file tab as well.  If you like them do I would appreciate it if you left a comment and it would be so much fun if you posted a link to your project :)
SO here are the snapshots of the file

Round We Go


CircDSwirl
Lol do not know why I named it such

And finally
CirclePaperLace


post signature

Monday, June 27, 2011

Silhouette machine

I unpacked it and set it up and tried cutting a print and cut image with it. It cuts intricate details as tiny as a a double strand of hair. I am so impressed. And print and cut is awesome. It did keep saying can't find registration mark until I manually dragged it to first point and then it automatically started finding other registration marks.
I also played with software. One thing I found out while converting AI files to .dxf format - is that one needs to ungroup and also release all compound paths else you get an error. Yep the scroll square frame. I wish it accepted svg files directly and  more easily. If only it were 12 x 12 but no problem now either as I am going to use this mainly for print and cut and it so easy printing in your regular printer and putting it on here and if I want bigger I always have the huge 24 inch knk don't I? I haven't yet tried MTC with both knk and silhouette. I need to do that soon and also start using the knk for embossing , emgraving and punching.


post signature

Sunday, June 26, 2011

Scroll Square Frame

I was playing with AI and made this scroll square frame.
I have not cut it out yet. The file is up in svg  tab (in my blog) though if you want to play with it.


post signature

Thursday, June 2, 2011

Hip hopping - windmill

I am hip hopping among 3 programs - Illustrator, KNK and MTC and having so much fun making some stuff.

Here is a picture of windmill  svg file I created. File is under svg files from the tabe


post signature

Tuesday, May 31, 2011

Blob brush in illustrator CS5

I am so loving this blob brush in illustrator CS5. It came in cs4 and I so love this feature along with the multiple artboards. So totally worth upgrading to cs5. I am of course learning and  love the tutorials by Deke McClelland - lynda.com and also Laura Coyle - reneepearson.com. Both are such great instructors.
Especially with the new cutter when I try to convert dover jpg images from the cd to cuttable files - svg - just trace - expand and if there are open gaps or very thin lines - use the blob tool. (I usually trace while choosing the tracing options set with white not chosen)
I have the knk but remember in Ai to svg you need the fill set to color while the stroke should be 0 pts. So I alternate between the two while correcting and when I am happy I make most usually compound paths out of it - make sure the fill is set and the stroke is set to (no stroke) or 0 pt.

I just thought I would add some pictures to show what I was talking about. Here's the picture of a traced ai file. Note how the image is broken in some places of stem. So if I need to join I can manipulate the nodes in knk studio or older illustrator.


But if with cs5 it makes it so easy


So after using the blob brush and connecting I make sure I drop down or twirl open the layer and choose the particular layer I want which is the completed image


I then move the layer to a new layer (not necessary to do this way you can directly delete all the other layers but I like to do it this way) and then delete the other layer


After that I select the image and make a compound path


And then I make sure I fill it with color and set the stroke to none


In the beginning after tracing I usually like to set the artboard to 12 in by 12 inch. After all this I save the file as both ai and svg. Then I sometimes take it to either knk studio or MTC and play with it there like adding a card welding etc

for eg this is a  image I traced from dover ornamental fixed it and saved as svg


Then I took it to knk and made this square card


So I hope these images helps someone a little


post signature

Sunday, May 22, 2011

All the tools

I finally got the pazzles distressing tool so now I have all the tools I want to play  - for knk - punch (knk), embossing (pazzles), engraving (cougar and knk )
But first I have to calibrate both the general and the laser so that I can start playing seriously.
The mat had to be deglued. I had to use googone to strip if of glue and then use aleene tacky over diluted to apply. It is now ready and hopefully this time the paper wil not stick so much. Krylon was a bad idea.
Zig or tacky is the way to go.

post signature

Wednesday, May 18, 2011

Square card 1

I have been playing with knk studio. Not able to go upstairs as I am sick - so I have not tested this out yet. But will share the file after I cut and check

The medallion is from dover. Here's the screen shot


post signature